Here is a tutorial with pictures showing how to set proxy for your browsers (Internet Explorer, Google Chrome and Mozilla Firefox) step by step. It’s similar to set proxy for other browsers such as safari and opera.
Set Proxy in Internet Explorer (IE)
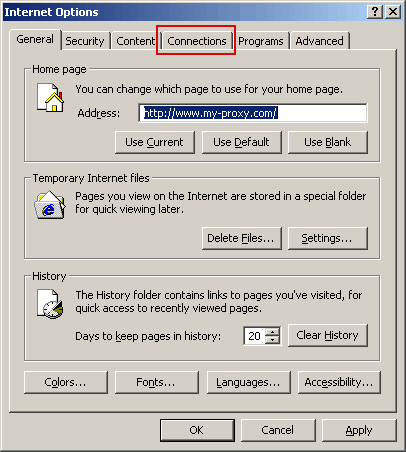
1) Click the Tools -> Internet Options in Internet Explorer to get to the following screen:

2) Click the Connections tab and then LAN Settings.

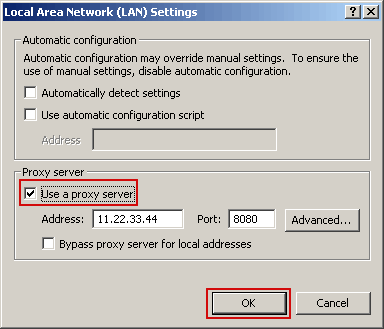
3) Select Use a proxy server and enter your proxy server IP Address and Port into the field. Click OK and the proxy server is now set. For example, the proxy is 11.22.33.44:8080. You should input it like this.

Set Proxy Server in Chrome
Google Chrome uses the system proxy settings. That is, it uses the same proxy as IE. So you can use the same method as IE to set proxy for Chrome. You can also click the Chrome menu Setting -> Under the Hood -> Network -> Changing proxy settings. It will popup the same proxy setting dialog as IE.
Set Proxy Server in Firefox
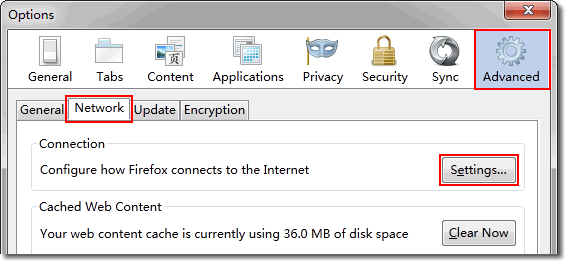
1) Click the Tools -> Options in Firefox to get to the following screen:

2) Click the Advanced -> Network -> Settings.

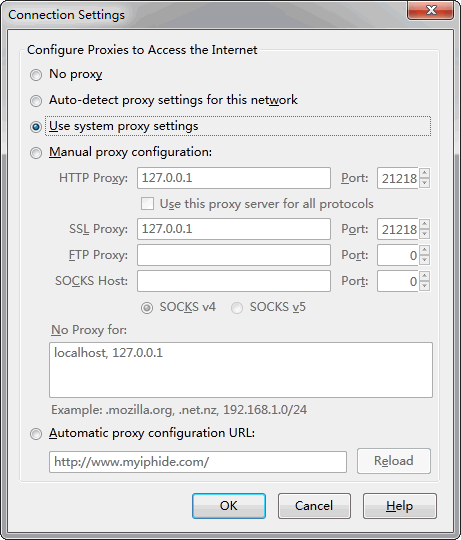
3) Select Manual proxy configuration and fill in the proxy IP and port. However, it’s a good choice to use system proxy settings in most cases.
Use EPS to Set Proxy for IE, Chrome and Firefox
If you need to change proxy frequently, it will be boring to do the repetitive things. Elite Proxy Switcher is a good tool to help you. Double click the proxy in the list and that’s all. Elite Proxy Switcher will do all the work above for you, both for Firefox and IE.
Download the EPS here:Elite Proxy Switcher
How to Get Proxy
You can get some free proxies from our forum or proxy list. Please test the proxies by Elite Proxy Switcher before using them because proxies die fast. After setting the proxy, you can surf http://www.find-ip.net to check whether your IP is changed.
